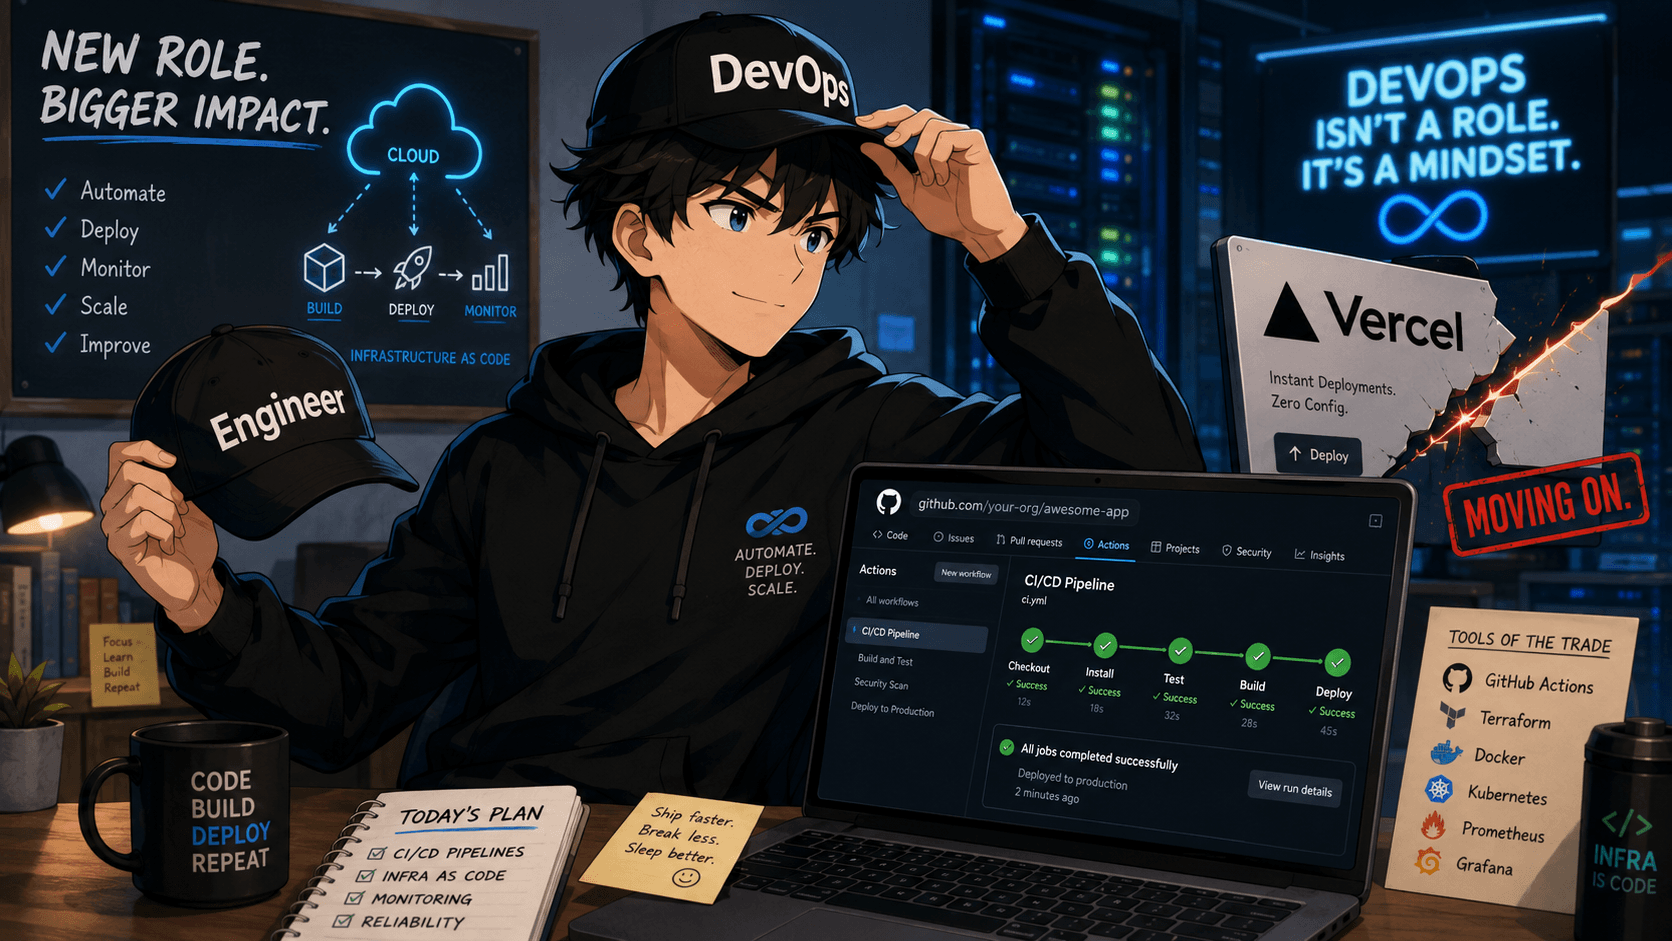
Moving a site off Vercel onto a VPS and Docker
You press "deploy" on Vercel and the site works.
Domain, HTTPS, fast images, pages that update themselves.
Everything "just works."
That is the trap. It looks like Vercel is one thing.
It is not.
Vercel is about six different services, packaged so well that you never felt the seam between them. When you move to your own server, the seams become yours. You have to rebuild them, one at a time.
This post is the rebuild. It teaches DevOps the way I actually learned it — not as a list of definitions, but as one concrete job: taking a real Next.js content site, produsebaby.ro, off Vercel and onto a rented Linux box running Docker.
And it carries one example the whole way through.
A parent in Romania opens their phone.
They type
produsebaby.ro/carucioare/cele-mai-bune-carucioare.They want to read your article about the best baby strollers.
That page exists right now in the code: src/app/[category]/[slug]/page.tsx, with revalidate = 86400. It has text. It has stroller photos. It has affiliate links.
Every time I say "the request," that is the request.
You follow it with your finger. From the parent's phone all the way to the pixels on the screen. Through every single piece.
By the end you should be able to close this page and say the whole flow out loud. If you can, it worked. If you only learned some new vocabulary, read it again.
Chapter 1 — What Vercel was actually doing for you
Let's follow that request today, while you are still on Vercel.
Here is its path:
The parent's phone
↓
DNS: "where is produsebaby.ro?" → Cloudflare → Vercel
↓
Vercel's network receives the request (nearest city to the user)
↓
HTTPS: Vercel already installed the certificate, the connection is encrypted
↓
Vercel looks for the page in its cache (ISR)
↓
Page is fresh → send it directly
Page is stale → regenerate it, then send it
↓
The images on the page → optimized and served from Vercel's CDN
↓
The parent sees the article
Six things happened there. Each one done by Vercel, free for your attention. Name them, because each one becomes a chapter — and each one is really the same question in disguise: once Vercel is gone, who does this work now?
1. It ran the build. When you did git push, Vercel ran the exact command from your package.json:
panda codegen && next build && pagefind --site .next/server/app --output-path public/pagefind
On a VPS, the build becomes your job.
2. It hosted the app. The built code has to run somewhere — a live next start process, waiting for requests. Vercel started it and kept it alive. On a VPS, you start the process and you keep it alive.
3. It put HTTPS on. The padlock in the address bar. The TLS certificate, auto-renewed. You never touched this subject. Vercel made it invisible. On a VPS, you get the certificate — and the good news is this can be nearly invisible too.
4. It served static files from a CDN. The 597MB in public/ — 2844 images plus the Pagefind search index — were never served by your app. Vercel put them on its CDN: copies of the files in cities all over the world, close to users. That is why this odd hack exists in next.config.ts:
outputFileTracingExcludes: {
  '*': ['public/**'],
}
It tells Vercel: "do not stuff the 600MB of images into the function that runs the code — the images are served separately, by the CDN." Without it, the function blew past Vercel's 300MB limit and failed. On a VPS there is no 300MB limit, so the hack becomes irrelevant. But a new, very practical question appears: who serves those 597MB now?
5. It optimized the images. When the page asks for a stroller photo, you do not get the original 2MB file. next/image delivers a resized WebP, exactly as wide as the phone screen — maybe 40KB instead of 2MB. That optimization ran on Vercel's servers. On a VPS, it runs inside your own Node process, with a library called sharp (already installed).
6. It regenerated the pages by itself (ISR). revalidate = 86400 means "this page is good for 24 hours; after that, regenerate it from fresh content." Vercel kept track of which page was stale, when to remake it, where to put it. This is the piece you are least sure about, and rightly so — it is the subtlest. The big relief: ISR is not Vercel magic. It runs on your server too.
So what is a VPS, really? Now you can see it clearly.
Vercel gives you:  build + hosting + HTTPS + CDN + image optimization + ISR
                   (all already running)

A VPS gives you:   a bare computer
                   (you add the rest)
It is not a loss. It is a trade. You lose convenience. You gain control, and usually a small fixed monthly cost instead of a bill that grows with traffic.
And the pieces are not many. There are exactly six, and you already have their names:
build              → Docker + GitHub Actions
hosting            → VPS + container + compose
HTTPS              → Caddy (reverse proxy)
CDN + static files → Caddy + Cloudflare
image optimization → sharp, in your container
ISR                → cache on disk, in a volume
One honest thing so you don't worry needlessly: DNS is already solved. produsebaby.ro already lives on Cloudflare, and Cloudflare already gives you a free CDN in front. So of the six pieces, one is half-done before you start. You are not starting from zero. You are starting from Cloudflare already standing up.
Chapter 2 — The empty computer: your VPS
VPS stands for Virtual Private Server. Three words that sound important and explain nothing.
Here is what it is, no detours:
A VPS is a computer running in a data center, which you rent by the month, and talk to over the internet instead of with a keyboard.
That's it.
No monitor. No keyboard. It sits in a room full of other computers, somewhere in Germany or Finland, powered on around the clock. You speak to it over the internet.
Why "virtual." You could rent a whole physical machine. It is expensive and far too much for one site. Instead, the provider takes one big physical server and slices it in software:
One huge physical server
↓
sliced in software into 20 smaller computers
↓
each slice = one VPS
↓
you rent one slice
Each slice behaves like a complete, separate computer. Its own sliver of CPU, its own memory, its own disk. Neighbors on the same physical box cannot see your files. That is why it is "virtual" (cut in software, not a physical box) and "private" (your slice is yours).
"You have root." You will hear "you have root access" and "full control." root is the boss user on Linux. It can do anything: install programs, start services, delete everything by accident. On Vercel you never had this — you ran inside their box, by their rules.
Good:  you can install Docker, run anything, nobody says no.
Bad:   if you break something, you fix it. Nobody is on call.
The reassuring part: with Docker (the next chapters), you touch "root" very rarely. You install Docker once, and after that you work almost entirely through it.
How you talk to it: SSH. No monitor, so how do you give it commands? Through SSH — Secure Shell. An encrypted tunnel from the terminal on your laptop to the command line on the server.
Your laptop (terminal)
↓  ssh, encrypted
The internet
↓
The VPS, its command line
It looks like this:
ssh root@188.34.xxx.xxx
root is who you log in as. 188.34.xxx.xxx is the server's IP address (the provider gives it to you when you create the VPS). You press Enter, and suddenly your terminal is typing commands on the server in Germany.
You do not log in with a password. You log in with an SSH key: a pair of files, one secret on your laptop, one public on the server. They fit together like a key in a lock. Remember this shape — something secret with you, its public pair on the server. It comes back at deploy time.
How big a VPS do you need? Three numbers matter.
CPU. How many "vCPU." For you it matters for two things: building the site and optimizing images with
sharp. Both eat CPU in short bursts.RAM. How much it holds in mind at once.
next buildon a content-heavy site wants memory. Below a threshold, the build dies with "out of memory."Disk. Where the images live. You have 597MB in
public/, plus the system, plus the Docker images. It adds up.
Translated for this site — static-first, ISR, no database, small-to-medium traffic — the hard part is not serving visitors. It is building and optimizing images. A reasonable starting target:
2 vCPU
4 GB RAM   (so the build doesn't die on your rich content)
~40–80 GB disk (images + Docker need room to breathe)
Do not take the smallest plan "to save money." A build that dies for lack of RAM costs you more hours than the few euros a month. And you can always grow — most providers let you resize from a panel in minutes.
Common providers for small VPSes: Hetzner (cheap, data centers in Germany/Finland — close to Romanian users, so low latency), DigitalOcean (friendly panel, lots of beginner docs), Vultr, Linode/Akamai, Contabo (a lot for a little, but more variable). The order of magnitude for the specs above is "a few euros up to ~15–20 €/month" — a fixed cost, unlike a Vercel bill that grows with traffic.
Here is the mistake everyone makes at the start: "VPS means I have to learn Linux administration." Partly true, but less than you think. Without Docker, yes — you install Node by hand, configure services, fight versions. Painful. With Docker, the VPS becomes almost empty inside. You install Docker once. After that, everything that runs — the app, the proxy — comes packaged. The server barely knows what Next.js is. It just runs containers.
And when is a VPS not the answer? If you want zero hassle and don't mind a cost that grows with traffic, Vercel is hard to beat — you pay precisely so you never do any of this. A VPS makes sense when you want a fixed, predictable cost, when you need control the platform won't give you, or when your reason is I want to learn DevOps. That last one is a very good reason, and it is the one driving this whole post.
Chapter 3 — Packaging the app: images and containers
A Docker image is a sealed box with everything your app needs to run: the built code, node_modules, the runtime version, even the system files.
It solves one problem, but a big one: "works on my machine."
Without Docker:  your laptop has version 1.3.5, the server has another → it breaks.
With Docker:     YOU package the exact versions → it runs the same everywhere.
An image is a cooked meal, sealed. Not instructions — the food, already made. You reheat it anywhere and it is identical.
Do not confuse the image with the container:
The image     = the template, frozen, on disk. Does not run.
The container = an instance started from the image. Runs.
The image is the class, the container is the object. One image → any number of containers.
How an image is built: the Dockerfile. An image is born from a file called Dockerfile: a list of steps, top to bottom. Each step is a layer, which Docker caches.
FROM ...     ← start from a ready-made image (e.g. bun installed)
COPY ...     ← bring your files in
RUN ...      ← run commands (install, build)
CMD ...      ← the command that starts when it becomes a container
Layer caching is why order matters: if package.json hasn't changed, Docker reuses the bun install layer and skips it. That is why you copy package.json first, then the rest of the code.
The one config change: output: 'standalone'. A normal next build leaves a .next that needs all of node_modules to run — hundreds of useless MB in the image. output: 'standalone' tells Next: "figure out exactly which files from node_modules are actually used at runtime, and put them in a small folder, .next/standalone, with its own server.js." So you add to next.config.ts:
const nextConfig: NextConfig = {
  output: 'standalone',   // ← ADD this
  images: {
    minimumCacheTTL: 2678400,
    remotePatterns: [{ protocol: 'https', hostname: '**.akamaized.net' }],
  },
  // outputFileTracingExcludes: no longer needed on a VPS (it was for Vercel's 300MB limit).
}
Now the trap everyone falls into:
standalone does NOT copy
public/or.next/static. It leaves them out on purpose. If you don't copy them into the Dockerfile yourself, ALL your images and CSS return 404.
Hold that thought. We fix it below.
The real Dockerfile. Your build has three steps: panda codegen, next build, then pagefind. The Dockerfile does all three, in two stages (multi-stage):
Stage 1 (builder):  installs everything, builds, generates Pagefind.  Heavy.
Stage 2 (runner):   copies ONLY the result. Light. This is what ships.
# ---- Stage 1: builder — has everything needed to build ----
FROM oven/bun:1 AS builder
WORKDIR /app

# Manifests first → cache bun install as long as they don't change
COPY package.json bun.lock ./
RUN bun install --frozen-lockfile

# Then the rest of the code
COPY . .

# Your full build: panda + next build + pagefind (exactly package.json)
RUN bun run build

# ---- Stage 2: runner — only what's needed to RUN ----
FROM oven/bun:1 AS runner
WORKDIR /app
ENV NODE_ENV=production
ENV PORT=3000
ENV HOSTNAME=0.0.0.0

# 1) the standalone server (small, node_modules already triaged)
COPY --from=builder /app/.next/standalone ./
# 2) the static CSS/JS — standalone omits it, you copy it (the trap)
COPY --from=builder /app/.next/static ./.next/static
# 3) the files in public/ (images + the Pagefind index built at build time)
COPY --from=builder /app/public ./public

EXPOSE 3000
CMD ["bun", "server.js"]
Those three COPY --from=builder lines are the heart. The first brings the server; the second and third fix exactly the 404 trap.
And a .dockerignore so COPY . . doesn't drag in your local node_modules, .next, .git:
node_modules
.next
.git
.env*
*.log
You build the image from the project root:
docker build -t produsebaby:latest .
-t produsebaby:latest is the name and tag. The . means "the Dockerfile is here." At the end you have an image on disk, ready to start. (:latest is fine here, local, to learn. In automated deploys we'll tag with the commit instead — traceable and easy to roll back.)
Now start it. The image sits on disk and does nothing. A container is that image started — a live process.
docker run produsebaby:latest
↓
Docker takes the image (frozen)
↓
starts it → now it's a container running `bun server.js`
↓
your app listens on port 3000, inside
Here is the rule you have to feel in your stomach:
Whatever a container writes to its own disk disappears when the container is deleted or rebuilt.
A container is disposable. Stop it, start another from the same image, and it is clean, like new. It remembers nothing. Why that matters directly:
ISR writes regenerated pages to disk (.next/cache).
next/image writes optimized images to disk (.next/cache/images).

Next deploy → new container → its disk is empty → all that cache is lost.
The fix has a name: a volume. A volume is a folder on the VPS (which stays) linked into a folder inside the container. What the container writes there lives on the VPS, not in the container. New container → same volume → the cache is still there. Remember the shape: the container is disposable; the volume is the memory that survives. We use it seriously in the ISR and image chapters.
To reach the app from outside, you punch a port through — the app listens on 3000 inside a closed box:
docker run -p 3000:3000 produsebaby:latest
-p 3000:3000 means "port 3000 on the VPS → port 3000 in the container." And to change settings without rebuilding the image, you pass environment variables (-e KEY=value), read in code as process.env.KEY. Secrets come in this way too — never baked into the image.
Two commands you will lean on constantly:
docker ps          # what containers are running now
docker logs <id>   # what the app printed (your errors live here)
On Vercel you looked in a dashboard. Here you look in docker logs.
One honest tradeoff before we move on: the COPY /app/public line stuffs those ~597MB (images + Pagefind) straight into the image. Simple, one artifact, works first try. But every deploy then ships ~600MB, and you rebuild even when you add just a few products. For now, that's fine — you want something that works, so you can learn. We decouple public/images from the image later, so deploys get fast again. First simple that works, then fast.
Chapter 4 — The whole stack in one file: Compose and Caddy
The command above already carries -p, several -e flags, soon volumes, plus a second container. That becomes a long, fragile line you don't want to type correctly every time.
So you stop typing it. Your site needs two containers working together:
app    → your Next app (bun server.js, on 3000)
caddy  → the reverse proxy, which takes the public traffic and the HTTPS
Docker Compose writes all of it once, in a file, and starts everything with one command:
docker compose up -d
-d means "detached," runs in the background. One command, the whole stack up.
Here is the complete stack, the starter version:
services:
  app:
    build: .                      # builds from the Dockerfile
    restart: unless-stopped       # if it crashes / the VPS reboots → it comes back
    environment:
      - NODE_ENV=production
      - NEXT_PUBLIC_SITE_URL=https://produsebaby.ro
    volumes:
      - nextjs_cache:/app/.next/cache   # ISR + optimized images survive redeploys
    expose:
      - "3000"                    # visible ONLY to other containers, not the internet

  caddy:
    image: caddy:2                # ready-made image, you build nothing
    restart: unless-stopped
    ports:
      - "80:80"                   # HTTP  → comes in from the internet
      - "443:443"                 # HTTPS → comes in from the internet
    volumes:
      - ./Caddyfile:/etc/caddy/Caddyfile:ro   # the proxy's config
      - caddy_data:/data          # where Caddy keeps TLS certificates (so it doesn't re-fetch)
      - caddy_config:/config
    depends_on:
      - app                       # start app before caddy

volumes:
  nextjs_cache:
  caddy_data:
  caddy_config:
Three ideas, that's all.
1. expose vs ports — the security difference.
ports:  "443:443"  → open to the INTERNET. Anyone can reach it.
expose: "3000"     → open only to the other containers in the stack.
Only caddy has ports. Your app is hidden behind, on expose. Nobody outside hits Next directly — everyone goes through Caddy. That is exactly what you want.
Internet → caddy :443 → app :3000
            (public)     (hidden)
2. Volumes are the memory that stays. nextjs_cache links /app/.next/cache inside the container to space that lives on the VPS. New container at deploy → same volume → ISR and optimized images are still there, not from scratch. caddy_data does the same for the TLS certificates.
3. restart: unless-stopped is self-restart. App crashes? VPS reboots? The containers come back automatically. On Vercel you never had this worry; here you solve it with one line.
And there is a hidden network: Compose automatically puts both containers on the same private network and names them. That is why, in the Caddy config next, you just write app:3000 — app is the service name, and Docker translates it to the right container. No IPs, no headache.
Now, what is Caddy actually doing at the front? Your app listens on port 3000, plain HTTP, hidden on the private network. The internet speaks on 443 (HTTPS) and 80 (HTTP), and demands a certificate. Something has to stand at the border and translate. That is the reverse proxy.
Internet (443, HTTPS, wants a certificate)
↓
REVERSE PROXY  ← stands at the door
↓
app:3000 (plain HTTP, behind)
"Reverse" because it guards the servers, not the clients. It is the building's receptionist: it takes everyone off the street and sends them to the right office inside. Concretely it does four jobs — terminates HTTPS (puts the padlock on, decrypts, sends plain HTTP behind), fetches the certificate automatically and free from Let's Encrypt and renews it, routes everyone to app:3000, and compresses responses.
That second job is why we pick Caddy over the classic Nginx. With Nginx, HTTPS means installing certbot, writing config, adding a renewal cron — steps you can get wrong. Caddy does HTTPS automatically, first try. You give it the domain name; it requests the certificate itself, installs it, renews it.
Nginx:  maximum power, you configure the certificates yourself.
Caddy:  90% of cases, HTTPS free and automatic, four lines of config.
Here is the entire Caddyfile. Four lines that matter:
produsebaby.ro {
    encode gzip zstd
    reverse_proxy app:3000
}

www.produsebaby.ro {
    redir https://produsebaby.ro{uri} permanent
}
The mere fact that you wrote the domain name in produsebaby.ro { ... } makes Caddy request the TLS certificate for it automatically. reverse_proxy app:3000 forwards everything to the app container on the private network. The www block sends www visitors to the canonical no-www address (good for SEO).
So here is the back half of our request flow — the first arrows of a diagram we'll keep adding to:
Internet
↓  :443, encrypted
caddy: checks the certificate, decrypts
↓  app:3000, plain HTTP, private network
app (Next) receives the request and starts working
Your app never knew about HTTPS. It got clean HTTP. Caddy carried all the encryption weight.
Chapter 5 — The pages that refresh themselves: ISR
This is your big fear: "ISR is something Vercel does. If I leave, do I lose it?"
Short, reassuring answer:
ISR is not Vercel magic. It is a Next.js feature. It runs just as well on your server. You only have to understand where it keeps its cache — and put that on a volume.
ISR is Incremental Static Regeneration. Your stroller page goes through three states:
revalidate = 86400 (from src/app/[category]/[slug]/page.tsx)
That means "this page is good for 24 hours; then, on the first request after, regenerate it in the background from fresh content." The three states:
FRESH   (under 24h)  → serve from cache instantly. Zero work.
STALE   (over 24h)   → still serve from cache instantly (the user does NOT wait),
                       AND kick off regeneration in the background. The next user
                       gets the new version.
MISSING (never built) → generate now, put it in cache, serve it.
The key idea: the user almost never waits. They always get something from cache; the new version bakes in the background. Static speed plus content that refreshes.
Where does the cache live? On disk, in .next/cache. This is the whole secret, and it is more boring than you feared. When Next generates the stroller page, it writes it as files, on disk, in .next/cache/... — an HTML file plus some metadata. A folder on disk.
Request for /carucioare/cele-mai-bune-carucioare
↓
Next looks in .next/cache
↓
found + fresh?  → send the file. done.
found + stale?  → send the file NOW, regenerate in background, overwrite on disk
missing?        → generate, write to disk, send
On Vercel, that "disk" was their infrastructure, spread across the whole CDN. On your VPS, that "disk" is the container's disk. Same mechanism, different place.
Who triggers the regeneration? A request — not a cron. A common confusion: you think a clock somewhere remakes the pages every 24 hours. No. Nothing happens until a request comes in for an expired page. That request is the trigger. It finds the stale page and starts the regeneration.
No request = no regeneration. The stale page sits quietly on disk.
First request after expiry = pulls the new version in the background.
So generateStaticParams (which you already use on three routes) pre-generates the pages at build time, so the first visit is already fast. ISR refreshes them afterward, on demand.
Now the bad version first. Here is the naive setup, with no volume:
Deploy → new container from the new image → its disk is EMPTY
↓
.next/cache is empty
↓
every page is "MISSING" → first visit regenerates it from scratch
↓
every deploy, the entire ISR cache is lost
Nothing breaks — but on every deploy, your first visitors pay to regenerate every page. On a content-heavy site, you feel it.
The fix you already know: a volume. It's one line in the Compose file:
    volumes:
      - nextjs_cache:/app/.next/cache
It links .next/cache inside the container to space that lives on the VPS, outside the container.
Deploy → new container → but .next/cache = the same volume as before
↓
the regenerated pages are still there
↓
ISR survives the deploy
One line. That is the whole difference between "ISR runs poorly on a VPS" and "ISR runs like it did on Vercel."
One hidden trap: stay at a single container. The on-disk-files mechanism assumes one container writing to that .next/cache. If one day you put two app containers behind Caddy for more traffic, each has its own volume. Container A regenerates the page; container B still sees the old version. They desync.
For you, now: stay at one container. Static-first, small-to-medium traffic — one container carries it easily. Just so you know it exists: if you ever scale to several containers, Next 16 gives you a cacheHandler in next.config.ts that keeps the cache in a shared place (usually Redis) instead of each container's disk. Remember only the rule: one container → volume on disk (simple, what you have). Several containers → shared cache (Redis, later, if ever).
Now the request flow grows — add ISR to the arrows from the last chapter:
caddy hands the request to app:3000
↓
Next: /carucioare/cele-mai-bune-carucioare — I look in .next/cache (on the volume)
↓
fresh → instant HTML.  stale → instant HTML + regenerate in background.
↓
caddy encrypts the response, sends it back
↓
the parent sees the article — and now the images enter the scene
Chapter 6 — Images, sharp, and whether you need a CDN
You have 2844 images. 404MB in public/images. All local — published products serve their photos from public/, not from an external CDN.
Two questions nag at you: who optimizes them now and do I need a CDN? Same running example, one thread.
What "optimized" means. The stroller page asks for a photo. The original file might be 2MB, 2000px wide. next/image does not send it as is:
Original:  carucior.jpg, 2000px, 2MB
Delivered to phone:  WebP, 640px, ~45KB
Resized to the screen, in a modern format, compressed. Forty times smaller.
Where the optimization runs now — and this is the change. On Vercel, it ran on their servers. On a VPS, it runs in your own Node process, with the sharp library (already installed).
Request: /_next/image?url=/images/carucior.jpg&w=640&q=75
↓
Next reads the source file from public/images
↓
sharp resizes it + converts to WebP   ← THIS eats CPU
↓
the result is written to .next/cache/images (on the volume!)
↓
sent to the user
Two things to keep from this. First, sharp eats CPU — the first request for a new size does real work (which is why the VPS chapter told you not to take the weakest box). Second, it happens ONCE. The result lands in .next/cache/images. The second visitor asking for the same photo at the same size gets it from cache, no work. And because .next/cache is on a volume, that cache survives deploys too. minimumCacheTTL: 2678400 in your config (31 days) reinforces it: it tells the browser and CDN "this optimized photo is good for a month, don't ask again."
Do you need a CDN? What it is, really. A CDN keeps copies of files in cities all over the world, close to users, so the photo comes from Frankfurt, not from your server.
Without a CDN:  every visitor → hits your VPS → the VPS sends the photo
With a CDN:     first visitor → VPS. Everyone else → from the CDN cache, near them.
Good news: you already have a CDN. produsebaby.ro is on Cloudflare, and Cloudflare is a free CDN. You don't buy anything. You just let it do its job over your images.
Which is the single most important optimization here — Cloudflare caching the optimized photos:
Without Cloudflare caching:
  every visitor → /_next/image → sharp works (or reads from disk)
  → your VPS works on every photo, for every visitor

With Cloudflare caching /_next/image:
  first visitor → sharp makes the photo once
  → Cloudflare holds it at the edge
  → thousands of visitors → straight from Cloudflare, the VPS never hears about it
So sharp runs once per (photo, size), then Cloudflare serves everyone. Your VPS barely breathes. You set this in Cloudflare with a Cache Rule that caches the paths /_next/image* and /images/*. Cloudflare already respects the Cache-Control header Next sets (from minimumCacheTTL), so it often works from the start.
The 600MB problem: don't bake images into the Docker image. In the packaging chapter we stuffed all of public/ into the Docker image. Simple, but painful:
The Docker image becomes ~600MB.
You add 5 new products → you rebuild and ship 600MB.
The images have nothing to do with the code, but you haul them on every code deploy.
The upgrade: keep the images on the VPS, outside the Docker image. They don't change on every code deploy, so they don't belong in the code artifact. Three moves.
First, put the images folder on the VPS once (e.g. /srv/produsebaby/images) and update it separately. Second, mount it into the container read-only, so the optimizer can read the photos:
  app:
    volumes:
      - nextjs_cache:/app/.next/cache
      - /srv/produsebaby/images:/app/public/images:ro   # ← photos live on the VPS, not in the Docker image
That line is a bind mount: path_on_VPS : path_in_container : options.
/srv/produsebaby/images   real folder, on the VPS disk (the host)
/app/public/images        where that folder appears INSIDE the container
:ro                       read-only — the container only READS, never writes
The container sees the VPS folder as if it were its own. Not a copy — the same folder, viewed from two places. Third, drop the images from the Docker image so you stop baking them, in .dockerignore:
public/images
Note that .next/static and the Pagefind index (public/pagefind) STAY in the image — those genuinely change with every build and must stay in sync with the code. Only public/images moves out, because it's large and independent of the code.
How the images get onto the VPS: rsync. You update the images "separately." With what? Here is the bad version first — copying the whole folder every time with scp:
scp -r ./public/images root@188.34.xxx.xxx:/srv/produsebaby/images
The problem: scp doesn't look at what's already there. It sends all 404MB, from scratch, even if you added just 8 new stroller photos. 404MB on the wire, for 8 photos. Every time. Slow, and pointless.
rsync looks at both sides first — what you have locally and what's already on the VPS — compares, and sends only the difference.
Your laptop: 2852 images
VPS:         2844 images
↓ rsync compares
sends only the 8 new ones
↓
VPS: 2852 images
The real command:
rsync -avz --delete ./public/images/ root@188.34.xxx.xxx:/srv/produsebaby/images/
-a        "archive": keep folder structure, dates, permissions
-v        "verbose": show which files it sends
-z        "zip": compress on the way, fewer bits on the wire
--delete  what you deleted locally, delete on the VPS too (exact mirror)
./public/images/   source (local) — the trailing / matters: "the folder's contents"
root@...:/srv/...  destination (on the VPS, over SSH)
You run it whenever you add or change product images locally. Only the new bits fly — no Docker rebuild, no code deploy. Images and code become two separate streams, exactly what you wanted. (Be careful with --delete: it makes the VPS an exact mirror of your local folder. The first time, run it without --delete, or add --dry-run, which shows what it would do without touching anything.)
Now the flow grows again — the image path folded in:
The stroller page asks for the photos
↓
/_next/image?url=/images/carucior.jpg&w=640
↓
Cloudflare has the optimized copy?  → sends it. The VPS is not even bothered.
↓ (if not)
Next + sharp make it once, put it in .next/cache/images (volume), send it
↓
Cloudflare holds it for everyone else
↓
the parent sees the strollers, fast
Chapter 7 — Getting the domain to the server: DNS and HTTPS
Until now, the request started magically heading for the server. This chapter explains the first step, the one that was missing: how the phone knows where "produsebaby.ro" is.
DNS is the phone book of the internet. Computers don't find each other by name, but by number (IP address). DNS translates.
"produsebaby.ro" = ?
↓ DNS question
"188.34.xxx.xxx"  ← your VPS's IP
↓
the phone connects to that number
That translation lives in an A record: name → IP.
A record: produsebaby.ro → 188.34.xxx.xxx
Right now your A record points to Vercel. The migration, in essence, is changing the IP in the A record to point to your VPS. That's it. The rest of the internet picks up the change on its own.
You make the change on Cloudflare, which you already use. You don't add a new provider — you just edit the A record:
produsebaby.ro       A     188.34.xxx.xxx   (the VPS IP)
www.produsebaby.ro   A     188.34.xxx.xxx   (same, Caddy redirects it)
The change propagates in minutes to hours (usually minutes on Cloudflare).
The cloud: DNS-only (grey) vs Proxied (orange). Next to each record, Cloudflare has a little cloud. This is the whole nuance, and it is simple once you see it.
Grey (DNS-only): Cloudflare just answers "the IP is X." The visitor connects directly to your VPS.
Phone → Cloudflare (only says the IP) → straight to the VPS
Orange (Proxied): the traffic goes through Cloudflare. This is where you get the CDN and the image cache from the last chapter.
Phone → Cloudflare (CDN, cache) → VPS
You want orange in the end, so it caches the images. But at first startup, orange complicates Caddy's certificate. That's why the order matters.
HTTPS: who puts the padlock on, and the two-layer trap. Recall that Caddy requests the certificate itself from Let's Encrypt. To grant it, Let's Encrypt verifies by hitting port 80 of the domain. The problem with orange on from the start:
Orange ON → Let's Encrypt hits port 80, but lands on Cloudflare, not Caddy
→ Caddy can't prove it owns the domain → no certificate → HTTPS fails
Plus, with orange you have two TLS layers (visitor↔Cloudflare and Cloudflare↔VPS) which, badly configured, fight each other ("too many redirects"). So do exactly this order:
1. In Cloudflare: A record → the VPS IP. Leave the cloud GREY (DNS-only).
2. Start the stack: docker compose up -d
   → Caddy hits Let's Encrypt unobstructed (port 80 reaches it directly)
   → gets the certificate, HTTPS works
3. Verify: open https://produsebaby.ro — padlock, site OK, straight from the VPS.
4. NOW turn the cloud ORANGE on the records.
5. In Cloudflare → SSL/TLS mode → "Full (strict)".
   → visitor↔Cloudflare encrypted, Cloudflare↔VPS encrypted, no quarrels.
6. Verify again. Now you also have Cloudflare's CDN in front (image cache).
Once fetched, Caddy keeps the certificate on the caddy_data volume, so it doesn't re-request it on every start, and it handles renewal by itself.
Now the flow finally grows a front — the first step is no longer magic:
Phone: "where is produsebaby.ro?"
↓  DNS (Cloudflare) → the VPS IP
↓  (orange) through Cloudflare — image cache
↓  :443
Caddy on the VPS: certificate valid, decrypt
↓  app:3000
Next: ISR from .next/cache
↓
Cloudflare caches, the parent sees the page
Chapter 8 — Shipping code: manual deploy, then GitHub Actions
You wrote new code on your laptop. How does it go live?
On Vercel: git push, done. Vercel caught the push, built, started. Invisible. On a VPS you have to know what was actually happening there, to rebuild it. Every deploy, however fancy, is the same four steps:
1. The new CODE reaches the server        (git pull, or a ready-made image)
2. The new image is BUILT                  (the Dockerfile)
3. The old container is REPLACED           with one from the new image
4. The volumes STAY                        (ISR, images, certificates — intact)
Remember these four and you won't get lost.
Method 1: build on the server (the simplest — start here). The code lives on the VPS as an ordinary git repo. Once, at the start, you clone it. Then every deploy is:
ssh root@188.34.xxx.xxx
cd /srv/produsebaby
git pull                        # step 1: the new code
docker compose up -d --build    # steps 2+3: rebuild the image, replace the container
--build rebuilds the image, then Compose stops the old container and starts a new one from the fresh image. The volumes pass through untouched.
Good:  simple, nothing to configure, you see everything happen.
Bad:   the build runs ON the VPS → eats its RAM (that's why 4GB).
       And you type commands by hand on every deploy.
Secrets never go in git. On the VPS you put them in a .env file next to docker-compose.yml (a file that is NOT in git), and Compose reads it automatically.
Method 2: build elsewhere, ship a ready-made image (registry). Method 1 has a flaw: the heavy build runs on your small VPS, while it is serving visitors. The alternative: build the image somewhere else, push it to a registry (a Docker image warehouse — e.g. GitHub Container Registry, ghcr.io), and on the VPS just pull it ready-made.
Somewhere powerful (laptop / GitHub)     Your VPS
────────────────────────────────────     ─────────────
build the image
push to ghcr.io          ───────►         pull from ghcr.io
                                          docker compose up -d
                                          (no local build!)
On the VPS, the deploy becomes:
docker compose pull    # pull the new, already-built image
docker compose up -d   # replace the container. Zero build on the VPS.
In docker-compose.yml, the difference is one line: instead of build: . you point to the registry image, tagged with the commit, not :latest:
  app:
    image: ghcr.io/your-user/produsebaby:${IMAGE_TAG:-latest}   # instead of "build: ."
${IMAGE_TAG:-latest} means "use the IMAGE_TAG variable, and if it's not set, fall back to latest." Why bother? Rollback in 10 seconds. Something broke? On the VPS:
IMAGE_TAG=<yesterday's-good-commit> docker compose up -d
and you're back to the version that worked, no rebuild, no git. Each commit has its own image in the registry, ready to restart. With :latest you'd have nothing to go back to — every version wore the same tag.
Now automate it: GitHub Actions. Doing the deploy by hand works, but it's tiring and easy to get wrong at 2 a.m. GitHub Actions does those steps by itself, on every git push — exactly what Vercel did, except now you wrote the recipe once. That's CI/CD:
CI (Continuous Integration): on every push, build and check automatically.
CD (Continuous Deployment):  if it's OK, ship to the server automatically.
What runs the recipe: a "runner." When you push, GitHub starts a temporary, free computer of theirs — a clean Ubuntu that lives for the ~3 minutes your job runs, then vanishes.
git push
↓
GitHub starts a runner (clean Ubuntu, on their side, free)
↓
the runner: builds the image, pushes it to the registry, calls the VPS to pull the new version
↓
the runner self-destructs
The beauty: the heavy build happens on their computer, not your small VPS. The VPS just pulls the ready image (method 2). Here is the recipe, .github/workflows/deploy.yml:
name: Deploy

on:
  push:
    branches: [main]        # triggers on push to main

# If you push twice fast, cancel the old run and keep only the latest.
concurrency:
  group: deploy-${{ github.ref }}
  cancel-in-progress: true

jobs:
  build-and-deploy:
    runs-on: ubuntu-latest  # the runner: a clean Ubuntu from GitHub
    steps:
      # 1. Get the code into the runner
      - uses: actions/checkout@v4

      # 2. Log in to the registry (GitHub Container Registry)
      - uses: docker/login-action@v3
        with:
          registry: ghcr.io
          username: ${{ github.actor }}
          password: ${{ secrets.GITHUB_TOKEN }}   # given automatically by GitHub

      # 3. Prepare buildx (the build engine with layer cache)
      - uses: docker/setup-buildx-action@v3

      # 4. Build the image and push it to the registry.
      #    tag = the commit (github.sha), not :latest → traceable + easy rollback.
      - uses: docker/build-push-action@v6
        with:
          context: .
          push: true
          tags: ghcr.io/${{ github.repository }}:${{ github.sha }}
          cache-from: type=gha
          cache-to: type=gha,mode=max

      # 5. Call the VPS over SSH and restart with that commit's image
      - uses: appleboy/ssh-action@v1
        with:
          host: ${{ secrets.VPS_HOST }}
          username: root
          key: ${{ secrets.VPS_SSH_KEY }}
          script: |
            cd /srv/produsebaby
            export IMAGE_TAG=${{ github.sha }}   # exactly the commit built now
            docker compose pull                  # pull that commit's image
            docker compose up -d                 # replace the container
Read the steps like a story: get the code → log in to the warehouse → prepare buildx → build and push the image (tagged with the commit) → call the server to pull exactly that commit. Exactly the manual deploy, written once. Three small lines do a lot of work:
1. Tag with github.sha, not :latest. github.sha is the hash of the pushed commit. :latest means "the latest" — which latest? You don't know what code is inside. :<commit-sha> means this image is this code. Traceable (you can always say exactly what runs in production) and easy to roll back. That's why the deploy step does export IMAGE_TAG=${{ github.sha }} before docker compose pull.
2. Docker layer cache → fast builds. cache-from / cache-to: type=gha save the Docker image layers in the GitHub Actions cache, between runs. First run: bun install runs from scratch. Later runs: if bun.lock hasn't changed, the bun install layer is reused from cache. Every Dockerfile line is a layer; the cache reuses the unchanged ones, on clean runners that would otherwise start from zero every time.
3. concurrency: cancel-in-progress → no overlapping deploys. You push, spot a mistake, push again fast. Without this, you'd have two deploys running in parallel, racing to reach the VPS last. With it, the new run kills the old one. Only the latest push goes live.
Where the passwords live. You never put passwords in the .yml (it goes into git, everyone sees it). You put them in GitHub → repo → Settings → Secrets, and call them with ${{ secrets.NAME }}. You need two, plus one free:
VPS_HOST      = the VPS IP
VPS_SSH_KEY   = the private SSH key the runner uses to enter the VPS
GITHUB_TOKEN  = GitHub gives it to you automatically, you don't set it
And there is the SSH key shape from the VPS chapter — something secret with you, its public pair on the server — except now the runner plays the role of "you":
The PRIVATE key  → in GitHub Secrets (VPS_SSH_KEY). Only the runner uses it.
The PUBLIC key   → placed on the VPS (in ~/.ssh/authorized_keys).
That is how the temporary runner logs into the VPS with no password, exactly like you, but automatically. What you gained, concretely:
Before:  git push → ssh VPS → cd → git pull → docker compose up --build → wait
With Actions:  git push → (go make a coffee) → it's live
You rebuilt the Vercel experience. You push, the rest happens on its own. Except now you know what happens, on every line.
Chapter 9 — The whole picture
You've seen every piece separately. Now put them in one picture and follow the parent's request from end to end, without skipping a single link.
The parent types produsebaby.ro/carucioare/cele-mai-bune-carucioare
│
▼  1. DNS (Cloudflare): "produsebaby.ro" → the VPS IP
│
▼  2. Cloudflare (orange cloud): CDN + image cache
│       └─ has the page/photo at the edge? → sends it, done.
│
▼  3. Your VPS, port 443
│
▼  4. Container `caddy`: verify the TLS certificate, decrypt
│       └─ reverse_proxy app:3000
│
▼  5. Container `app` (Next, bun server.js, port 3000)
│       ├─ page in .next/cache?  ISR: fresh→instant, stale→instant+regenerate
│       └─ photos: /_next/image → sharp once → .next/cache/images
│
▼  6. The volumes remember between deploys: nextjs_cache, caddy_data
│
▼  the response goes back up through Caddy → Cloudflare (caches) → phone
│
▼  the parent sees the strollers article. Fast.
All six services Vercel had glued together are there, now yours, each with its own name.
The whole migration fits in five new files plus one changed line:
produsebaby.ro/
├── next.config.ts              ← ADD: output: 'standalone'
├── Dockerfile                  ← NEW: the image recipe (bun, multi-stage)
├── .dockerignore               ← NEW: what not to put in the image
├── docker-compose.yml          ← NEW: app + caddy + volumes
├── Caddyfile                   ← NEW: domain + HTTPS + proxy
└── .github/workflows/deploy.yml ← NEW: auto-deploy on push
Plus, on the VPS (not in git): a .env with secrets and the /srv/produsebaby/images folder. And the plan, in order — each step leans on the one before:
Prepare (on the laptop)
1. Add output: 'standalone' to next.config.ts
2. Create Dockerfile, .dockerignore, docker-compose.yml, Caddyfile
3. Test LOCALLY: docker compose up --build → open localhost
   (if it works locally, it works on the VPS — that's the whole point of Docker)

The server (once)
4. Rent a VPS (2 vCPU / 4GB / ~40-80GB), get an IP
5. Connect: ssh root@IP, install Docker
6. Put your public SSH key on the VPS
7. git clone into /srv/produsebaby, create .env with the secrets
8. Upload the images to /srv/produsebaby/images (rsync)

Startup + domain
9.  docker compose up -d  → Caddy gets the certificate, the site comes up
10. In Cloudflare: A record → the VPS IP, GREY cloud
11. Verify https://produsebaby.ro directly from the VPS
12. Turn the cloud ORANGE + SSL "Full (strict)"
13. Cache Rule on Cloudflare for /_next/image and /images

Automation (last, once manual works)
14. Add .github/workflows/deploy.yml
15. Put the secrets in GitHub: VPS_HOST, VPS_SSH_KEY
16. git push → automatic deploy. You've rebuilt Vercel.
Don't jump to step 14 until the manual deploy works. First understand what you're automating, then automate it.
What you gain and lose versus Vercel. Honestly, so you decide with open eyes:
| Vercel | VPS + Docker | |
|---|---|---|
| Setup effort | zero | you build it all |
| Cost | grows with traffic | fixed, ~a few–20 €/month |
| Control | limited to the platform | total (you have root) |
| Build | on their side | on yours (or GitHub's runner) |
| When something breaks | they fix it | you fix it (docker logs) |
| What you learn | nothing about infra | real DevOps |
It is not universally "better." It is a trade: convenience for control, fixed cost, and understanding. And when should you not do this? If your site might explode in traffic tomorrow and you have no time for any of it, Vercel carries you without touching any of these files. You pay precisely so you're never on call. A VPS asks you to be the admin: certificate renewal (Caddy does it, but you check), server security, backups. Not hard, but yours.
Here is the final test. If you read all of this, you should be able to say, without looking:
First, DNS on Cloudflare translates my domain into the VPS's IP.
Cloudflare sits in front and caches the images, then sends the request to the VPS on 443.
Caddy receives it, puts HTTPS on, and hands it to the Next container on 3000.
Next looks in
.next/cache(on a volume) and either serves the ready page or regenerates it in the background — that's ISR, and it runs on my server, not just on Vercel.The photos are optimized by sharp once, kept in cache, and Cloudflare serves them to everyone else.
And when I
git push, GitHub Actions rebuilds the image and restarts the container, by itself.
If you can say that, you learned the DevOps you needed. Not some words. The whole flow.
Because that was the trade all along:
Vercel glued six services into one button.
You pulled them apart and put them back on a bare computer, each with its name.
You gave up the convenience, and took the control, the fixed cost, and the understanding.