How I migrated my website from Vercel to Hetzner
A step-by-step guide
The companion post explained the why — the six seams Vercel hid, and who does each job once it's gone.
This is the log. The what.
Every command, in order, with the traps I hit and how I got out of them.
Same site as before: produsebaby.ro, a Next.js content site. Same request the whole way through:
A parent opens their phone, types
produsebaby.ro/carucioare/cele-mai-bune-carucioare, and wants the strollers article.
By the end, that request travels through a stack I built by hand — and a git push rebuilds the whole thing on its own.
One note on secrets: everywhere you see <VPS_IP> or <user>, that's a placeholder. The real server IP, the GitHub username, the private keys — those never go in a blog post, and they never go in git.
The order matters. Each phase leans on the one before. Don't skip ahead.
0. Prepare the code (laptop)
1. Rent the server (Hetzner)
2. First deploy — build on the VPS
3. Go live — Caddy + DNS
4. Lock it down — firewall
5. Automate — GitHub Actions
6. Put Cloudflare in front
Phase 0 — Prepare the code, on the laptop
Three changes, one local test. Nothing touches a server yet.
1. Tell Next to build a self-contained bundle. In next.config.ts:
output: 'standalone',
This makes next build emit .next/standalone — the app plus only the node_modules it actually traced. That's what the container will run.
2. Write the Dockerfile. Multi-stage: a heavy builder, a lean runner.
# ---- builder ----
FROM oven/bun:1 AS builder
WORKDIR /app
COPY . .
RUN bun install --frozen-lockfile
RUN bun run build

# ---- runner ----
FROM oven/bun:1 AS runner
WORKDIR /app
ENV NODE_ENV=production
ENV PORT=3000
ENV HOSTNAME=0.0.0.0
COPY --from=builder /app/.next/standalone ./
COPY --from=builder /app/.next/static ./.next/static
COPY --from=builder /app/public ./public
EXPOSE 3000
CMD ["bun", "server.js"]
Trap: COPY . . comes before bun install. The obvious order is to copy package.json first and install, for better caching. It breaks here. My package.json has a prepare script that runs panda codegen, and codegen needs the config and source present. Install before the source exists → install fails. So copy everything first.
3. Write .dockerignore. Keep the image lean and secret-free:
node_modules
.next
.git
.env*
*.log
explanatory-docs
public/pagefind
.git and .env* are the important lines — no history, no secrets in the image.
4. Test locally. This is the whole point of Docker:
docker build -t produsebaby:latest .
docker run -d -p 3000:3000 --name test produsebaby:latest
curl -s -o /dev/null -w '%{http_code}\n' http://localhost:3000/   # 200
If it works in a container on the laptop,
it works in the same container on the server.
That's the contract. Delete the local container once you've seen 200 — it was just proof.
Phase 1 — Rent the server
I bought the cheapest tier that builds comfortably: 2 vCPU / 4 GB RAM / ~40 GB SSD, Ubuntu LTS, a datacenter in Germany. A few euros a month, fixed.
The SSH key. One rule, and it's the whole security model:
private key  → stays on the laptop, never shared
public key   → goes on the server
Paste the public key into the provider's panel when creating the server. You get an IP back.
Connect:
ssh root@<VPS_IP>
First connection asks you to trust the host fingerprint — yes. Then you're in, no password, because the key did the work.
Update the machine:
apt update && apt upgrade -y
If the upgrade pulls a new kernel, it says so. A new kernel only loads after a reboot:
reboot
The SSH session drops (normal). Wait ~30s, reconnect, confirm the new kernel:
uname -r
Install Docker. On a brand-new Ubuntu, the distro packages are the safe bet:
apt install -y docker.io docker-compose-v2
docker run hello-world   # "Hello from Docker!" → engine works
docker.io is the engine + docker CLI. docker-compose-v2 is the docker compose plugin. That's everything the server needs.
Phase 2 — First deploy: build on the VPS
The plan for the first deploy: get the code onto the server, build the image there, run it, curl it. Prove the container serves before adding HTTPS or a domain.
1. Add swap. A 4 GB box can run out of memory mid-build and get the process Killed. A swap file is the safety net:
fallocate -l 2G /swapfile && chmod 600 /swapfile && mkswap /swapfile && swapon /swapfile
2. Sync the code up with rsync — copy only what changed, delete what's gone, skip the junk:
rsync -avz --delete \
  --exclude node_modules --exclude .next --exclude .git \
  --exclude '.env*' \
  ./ root@<VPS_IP>:/srv/produsebaby/
The excludes matter: node_modules and .next get rebuilt in the image, .git and .env* must never leave the laptop.
3. Build, run, test — on the server:
cd /srv/produsebaby
docker build -t produsebaby:latest .
docker run -d -p 3000:3000 --name produsebaby produsebaby:latest
curl -s -o /dev/null -w 'status: %{http_code}\n' http://localhost:3000/   # status: 200
status: 200 means the site runs on the VPS — but only on localhost:3000. No HTTPS, no domain yet. That's the next phase.
Phase 3 — Go live: Caddy + DNS
Two containers, one config file each, then flip the domain.
Internet (443, HTTPS)
↓
caddy    ← the only thing exposed to the internet
↓  app:3000 (private Docker network)
app      ← Next, hidden behind Caddy
1. docker-compose.yml describes both containers:
services:
  app:
    build: .
    restart: unless-stopped
    volumes:
      - nextjs_cache:/app/.next/cache   # ISR + optimized images survive redeploys
    expose:
      - "3000"                          # visible ONLY to other containers

  caddy:
    image: caddy:2
    restart: unless-stopped
    ports:
      - "80:80"
      - "443:443"                       # the only ports open to the internet
    volumes:
      - ./Caddyfile:/etc/caddy/Caddyfile:ro
      - caddy_data:/data                # issued TLS certs live here
      - caddy_config:/config
    depends_on:
      - app

volumes:
  nextjs_cache:
  caddy_data:
  caddy_config:
expose vs ports is the security line: app is only reachable inside the private network; only caddy faces the internet.
2. Caddyfile — four lines gets you automatic HTTPS:
produsebaby.ro {
	encode gzip zstd
	reverse_proxy app:3000
}

www.produsebaby.ro {
	redir https://produsebaby.ro{uri} permanent
}
Naming the domain is what makes Caddy request and auto-renew a Let's Encrypt certificate for it. You configure nothing else for HTTPS.
3. Bring the stack up:
docker rm -f produsebaby        # remove the manual test container
docker compose up -d --build
docker compose ps               # app + caddy both "Up"
Caddy starts but can't get a certificate yet — the domain still points at the old host. It retries in the background. Fine.
4. Flip DNS. In the DNS panel, the two records that carry web traffic move to the VPS:
produsebaby.ro   A → <VPS_IP>   (grey cloud / DNS only)
www              A → <VPS_IP>   (grey cloud / DNS only)
Trap: you can't change a record's type. Mine were CNAMEs pointing at the old host. The edit form won't let you switch CNAME → A. Delete each one, add a fresh A record.
Trap: leave it GREY (DNS only) for now. Let's Encrypt validates over port 80. A proxy in front can interfere with that first handshake. Grey now, colored later (Phase 6).
Also: do not touch the MX and TXT records. Those run email. Only the two web records change.
5. Force the certificate, verify:
docker compose restart caddy         # try the cert now that DNS points here
curl -sI https://produsebaby.ro/      # HTTP/2 200
The response headers tell the whole story:
via: 1.1 Caddy        → traffic goes through my reverse proxy
x-nextjs-cache: HIT   → ISR is serving from cache
The chain works: DNS → VPS → Caddy (HTTPS) → app:3000 → Next. The site is live on my own server.
Phase 4 — Lock it down: the firewall
Trap: don't reach for ufw. Docker writes its own iptables rules and bypasses ufw for published ports. You'd think 80/443 are filtered; Docker quietly leaves them open behind ufw's back.
Use the provider's network-level firewall instead. It sits in front of the machine, so Docker can't route around it.
Internet
↓
Cloud firewall   ← filters here, before the VM
↓  (only 22 / 80 / 443 pass)
VM (Docker, Caddy, app)
Rules — inbound only, everything else dropped:
22/TCP    SSH    source: anywhere
80/TCP    HTTP   source: anywhere
443/TCP   HTTPS  source: anywhere
ICMP      ping   source: anywhere
outbound: allow all
Trap: include port 22 before you apply, or you lock yourself out. And after applying, test SSH in a new terminal while the old one is still open — so you can undo if you got it wrong.
Verify from the outside — allowed ports answer instantly, blocked ones hang until timeout:
for p in 22 80 443 3000 8080; do nc -z -G 5 -w 5 <VPS_IP> $p && echo "$p open" || echo "$p blocked"; done
22 open   80 open   443 open        ← the doors you want
3000 blocked   8080 blocked         ← ~5s each: dropped, not refused
That delay is the point. A refused port replies instantly with "no." A dropped port stays silent until the client gives up — the machine is invisible to a scanner on that port.
Phase 5 — Automate: GitHub Actions
Until now every deploy was manual: rsync, build, restart. This phase turns git push into the whole thing.
git push
↓
GitHub runner: build image → push to registry (tagged with the commit)
↓
runner SSHes into the VPS → pull that image → restart
↓
the runner disappears
The heavy build runs on GitHub's machine, not the little VPS. The VPS just pulls a finished image.
1. Point compose at the registry image. Change the app service so it can pull a tagged image, but keep build: . as a manual fallback:
  app:
    image: ghcr.io/<user>/produsebaby:${IMAGE_TAG:-latest}
    build: .
    restart: unless-stopped
    volumes:
      - nextjs_cache:/app/.next/cache
    expose:
      - "3000"
2. Write .github/workflows/deploy.yml:
name: Deploy
on:
  push:
    branches: [main]
  workflow_dispatch:

concurrency:
  group: deploy-${{ github.ref }}
  cancel-in-progress: true

permissions:
  contents: read
  packages: write

jobs:
  build-and-deploy:
    runs-on: ubuntu-latest
    env:
      IMAGE: ghcr.io/${{ github.repository }}
    steps:
      - uses: actions/checkout@v4
      - uses: docker/login-action@v3
        with:
          registry: ghcr.io
          username: ${{ github.actor }}
          password: ${{ secrets.GITHUB_TOKEN }}
      - uses: docker/setup-buildx-action@v3
      - uses: docker/build-push-action@v6
        with:
          context: .
          push: true
          tags: |
            ${{ env.IMAGE }}:${{ github.sha }}
            ${{ env.IMAGE }}:latest
          cache-from: type=gha
          cache-to: type=gha,mode=max
      - uses: appleboy/ssh-action@v1
        env:
          GHCR_TOKEN: ${{ secrets.GITHUB_TOKEN }}
        with:
          host: ${{ secrets.VPS_HOST }}
          username: root
          key: ${{ secrets.VPS_SSH_KEY }}
          envs: GHCR_TOKEN
          script: |
            echo "$GHCR_TOKEN" | docker login ghcr.io -u ${{ github.actor }} --password-stdin
            cd /srv/produsebaby
            export IMAGE_TAG=${{ github.sha }}
            docker compose pull
            docker compose up -d
            docker image prune -f
Three production habits are hiding in there: tag with github.sha (traceable, rollback-able — never rely on :latest), type=gha layer cache, and cancel-in-progress so a second push kills the first deploy.
Trap: permissions: packages: write. Without it, GITHUB_TOKEN is read-only and the push to the registry 403s. This one line is the most common first-run failure.
Trap: pulling a private image on the VPS. The image is private by default. The deploy step logs in on the VPS using GITHUB_TOKEN — but you must forward it with envs: (not just env:), and log in with --password-stdin.
3. Make a dedicated deploy key — not your personal key, so it's revocable on its own:
ssh-keygen -t ed25519 -f ~/.ssh/produsebaby_deploy -N "" -C "deploy"
ssh-copy-id -f -i ~/.ssh/produsebaby_deploy.pub root@<VPS_IP>
Trap: ssh-copy-id without -f. It first tries to log in "to filter out keys already installed." Since you already have SSH access via your personal key, that login succeeds, and it wrongly concludes the new key is already there — "All keys were skipped." -f skips the check and installs it.
4. Put the two secrets in GitHub (Settings → Secrets and variables → Actions):
VPS_HOST      → <VPS_IP>
VPS_SSH_KEY   → the deploy PRIVATE key (~/.ssh/produsebaby_deploy)
For the multi-line private key, copy it exactly with the clipboard:
pbcopy < ~/.ssh/produsebaby_deploy
Trap: the clipboard clobber. pbcopy puts the key on the clipboard — but any Cmd+C afterwards overwrites it, including copying a verification command out of a chat window. So pbcopy must be the last thing that touches the clipboard before you paste into GitHub. After it, go straight to the browser and paste. Nothing in between.
Trap: know which machine you're on. Read the prompt. you@laptop % is local; root@server # is the VPS. pbcopy is a macOS command and the private key only exists on the laptop — it cannot run on the server. The private key never leaves your machine; only its public half is on the VPS.
5. Sync the updated compose to the VPS. The deploy step runs docker compose pull on the server, so the server's compose file must have the new image: line:
scp docker-compose.yml root@<VPS_IP>:/srv/produsebaby/docker-compose.yml
Trap: a stale compose on the server is a silent no-op. If the server still has the old build:-only compose, pull has nothing to pull and the deploy just restarts the old container — "green," but nothing changed. (My earlier rsync had run before I edited the compose, so the server had the old one. This scp fixes it.)
6. Push, and watch:
git push
Open the repo's Actions tab. The steps run green: checkout, login, build-push (the slow one, first run has no cache), then the SSH deploy. Confirm the server is running the exact commit:
ssh root@<VPS_IP> 'cd /srv/produsebaby && docker compose images app'
# ghcr.io/<user>/produsebaby   <the pushed commit sha>
From now on: git push is the deploy. Rollback is IMAGE_TAG=<older-sha> docker compose up -d, because every image is tagged with its commit.
Phase 6 — Put Cloudflare in front
The last piece: a CDN and DDoS shield in front of the origin. Two settings, in this order.
Order matters. Set the SSL mode before turning the proxy on.
1. SSL/TLS mode → Full (strict). This makes Cloudflare talk to the origin over HTTPS and validate the origin's certificate. Caddy's Let's Encrypt cert is valid and trusted, so it passes immediately.
Flexible  → Cloudflare↔origin is plain HTTP. With Caddy's HTTP→HTTPS redirect,
            this loops forever ("too many redirects"). Never use it here.
Full (strict) → both legs encrypted, origin cert validated. Correct.
2. Turn the two A records ORANGE (Proxied). MX/TXT stay grey.
Now the request path changes:
phone → DNS → Cloudflare's edge → VPS → Caddy → app
Verify from the outside:
dig +short produsebaby.ro                                   # Cloudflare IPs, not <VPS_IP>
curl -sI https://produsebaby.ro/ | grep -i server           # server: cloudflare
curl -sI --resolve produsebaby.ro:443:<VPS_IP> https://produsebaby.ro/ | grep -i via  # via: 1.1 Caddy
DNS now returns Cloudflare's IPs, not the server's.
Public traffic shows server: cloudflare.
The origin, hit directly, still answers via Caddy — Full strict validated its cert.
The renewal fear was wrong. I worried the proxy would break Caddy's cert renewal (the TLS-based challenge does die behind a proxy). But Caddy falls back to the HTTP challenge, and Cloudflare lets /.well-known/acme-challenge/ pass through to the origin. Renewal keeps working.
What orange does not do: hide the origin. <VPS_IP> can still be hit directly, bypassing Cloudflare — I just did it with --resolve. To force all traffic through Cloudflare, restrict the firewall's 80/443 to Cloudflare's IP ranges only. That's real hardening, but it couples you to keeping the proxy on. Optional.
What I ended up with
Follow the request now — every hop is a piece I placed by hand:
the parent's phone
↓
DNS → Cloudflare's edge (CDN, DDoS, caches images)
↓
my VPS, port 443  (firewall: only 22/80/443 get in)
↓
caddy   → verifies TLS, decrypts, reverse_proxy app:3000
↓
app     → Next; ISR serves from cache or regenerates; sharp optimizes photos once
↓
volumes remember cache + certs across deploys
↓
the response goes back up → Caddy → Cloudflare (caches) → the phone
And the whole thing rebuilds itself:
git push → GitHub builds the image → pushes it tagged with the commit
         → SSHes into the VPS → pulls that exact image → restarts
The five files that made it happen:
next.config.ts              → output: 'standalone'
Dockerfile                  → the image recipe
.dockerignore               → what stays out of the image
docker-compose.yml          → app + caddy + volumes
Caddyfile                   → domain + auto HTTPS + proxy
.github/workflows/deploy.yml → git push = deploy
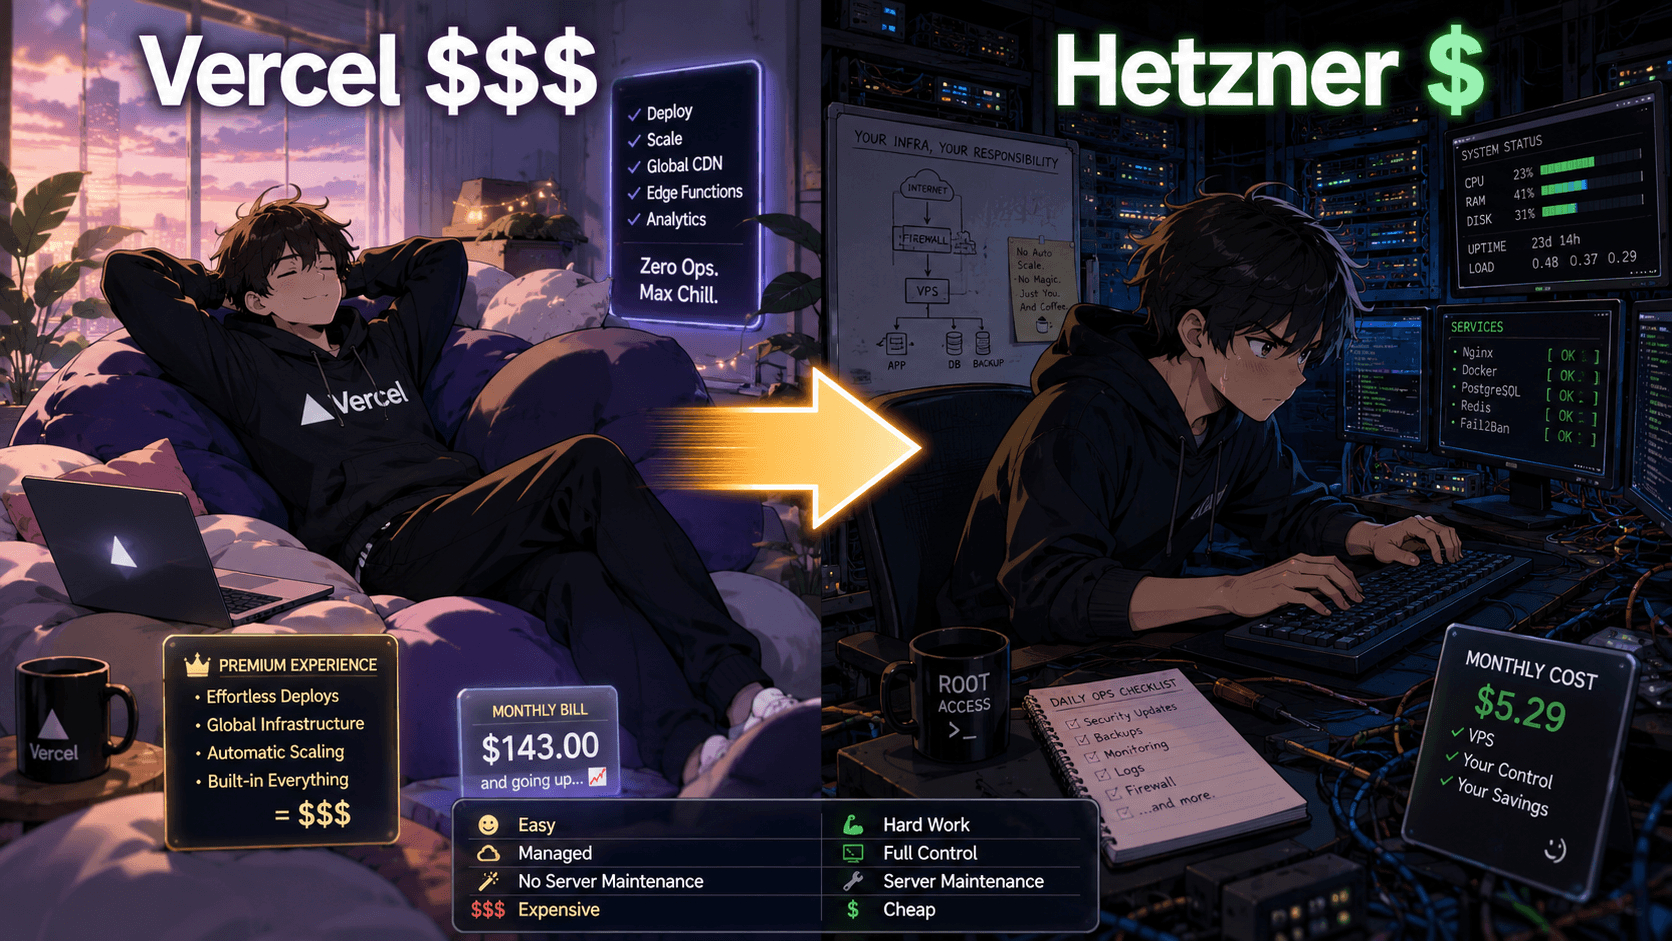
What it costs to be your own platform. Vercel is on call so you're not. Here, the admin is you: you watch the cert renew (Caddy does it, you verify), you keep the machine patched, you own the backups. Not hard. Yours.
The trade, said plainly:
Vercel glued six services into one button.
I pulled them apart and rebuilt each on a bare computer — build, hosting, HTTPS, CDN, images, ISR.
I gave up the convenience and took the control, the fixed cost, and the understanding.
Do the manual deploy first. Understand every hop. Then automate it — because now you know exactly what the automation is doing.